Tricks of the Trade
Wiring log cabins require some tricks of the trade to safely and efficiently get the electrical wire where you want it. It’s not as easy as wiring a stick-framed house, but not as hard as you might think to learn how to wire a log cabin.
With a stick-framed house built using studs to frame the walls, even if log siding has been installed, there are naturally many spaces between the studs where you can run wiring.
But when wiring log cabins you are dealing with solid wood logs and timbers so you need to create empty areas (called chases) for those wires.
How To Wire a Log Home
Learning how to wire a log cabin involves understanding the different ways you need to address the basic tasks:
- Wiring switches for lights and fans
- Running wire to electrical outlets
- How to cut spaces for outlets and switch boxes in log walls
- How to wire overhead ceiling fans in cabin great rooms
- How to handle wiring in interior walls in log homes
- Installing exterior outlets on log walls
Switches for Lights and Fans
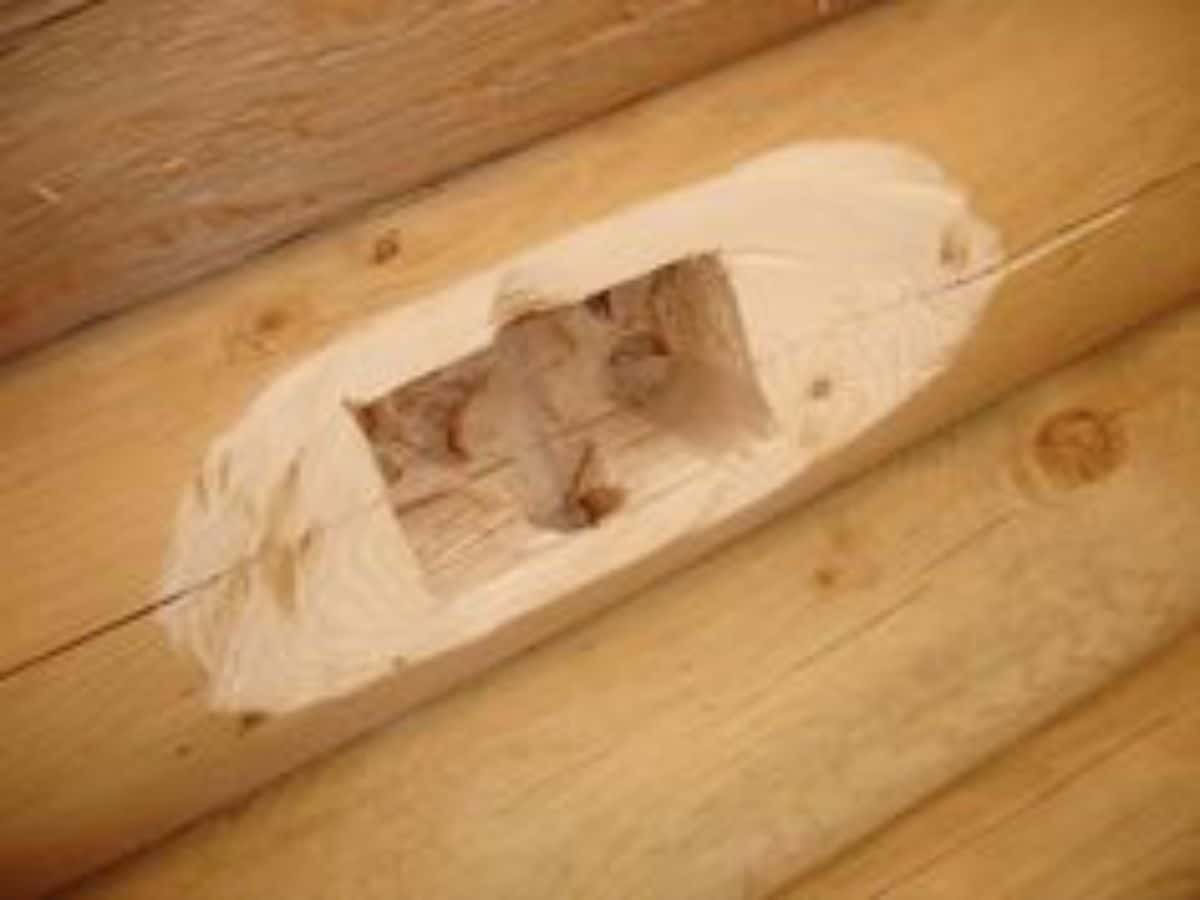
The first thing to realize is that even though you are building a solid log home, there are some natural chases already. When you create a doorway in a log cabin you will be building a door buck to hold the door that will be installed.
This door buck is typically built using 2” x 6” or 2” x 8” or 2” x 10” lumber – depending on the thickness of your logs – and is simply a frame installed within the log wall to mount the door.
You can split your door bucks in order to leave a slot in the middle for running cable. Another option is to use a compact router to carve out a channel for the wire in the backside of the door bucks or the face ends of the logs before you install the bucks.
A third way is to chisel a wire chase into the front face of the door bucks as seen in the picture. This will be covered with the door installation and trimming out later.
This method of concealing wiring is especially useful when wiring log cabins because every door will require at least one switch for a light upon entering the room.
Split window bucks built within the window cut-outs work in a similar fashion by providing a natural chase for wiring log cabins. Again, if necessary you can carve a channel or chase for the wires using a router or chisel into the log ends or into the backside of the window buck.
A kitchen window may be a good place to run the wiring for an overhead light switch above the sink or stove.
To get the electrical wire from the wiring chase around the door or window buck out to the light switch location, you can use a 3/4-inch x 54-inch fish bit to drill a hole at an angle prior to installing the door or window so that it breaks out of the log wall in the area where you will be mounting the switch box.
This hole will be where you cut out a cavity in the log for the switch box to be mounted.
Electrical Outlets in Wiring Log Cabins
We generally build log cabins using a log style known as 6” x 8” D-logs, that is, logs that are 6” thick and 8” high. To provide the basic electrical wiring for outlets in every room, we begin by laying down two courses of logs, secured to the sill and to each other by log fasteners such as log screws.
Then we go around the perimeter and precisely mark on the sub-floor the location of every electrical outlet, making sure that we meet the code requirements of an electrical outlet every 12’.
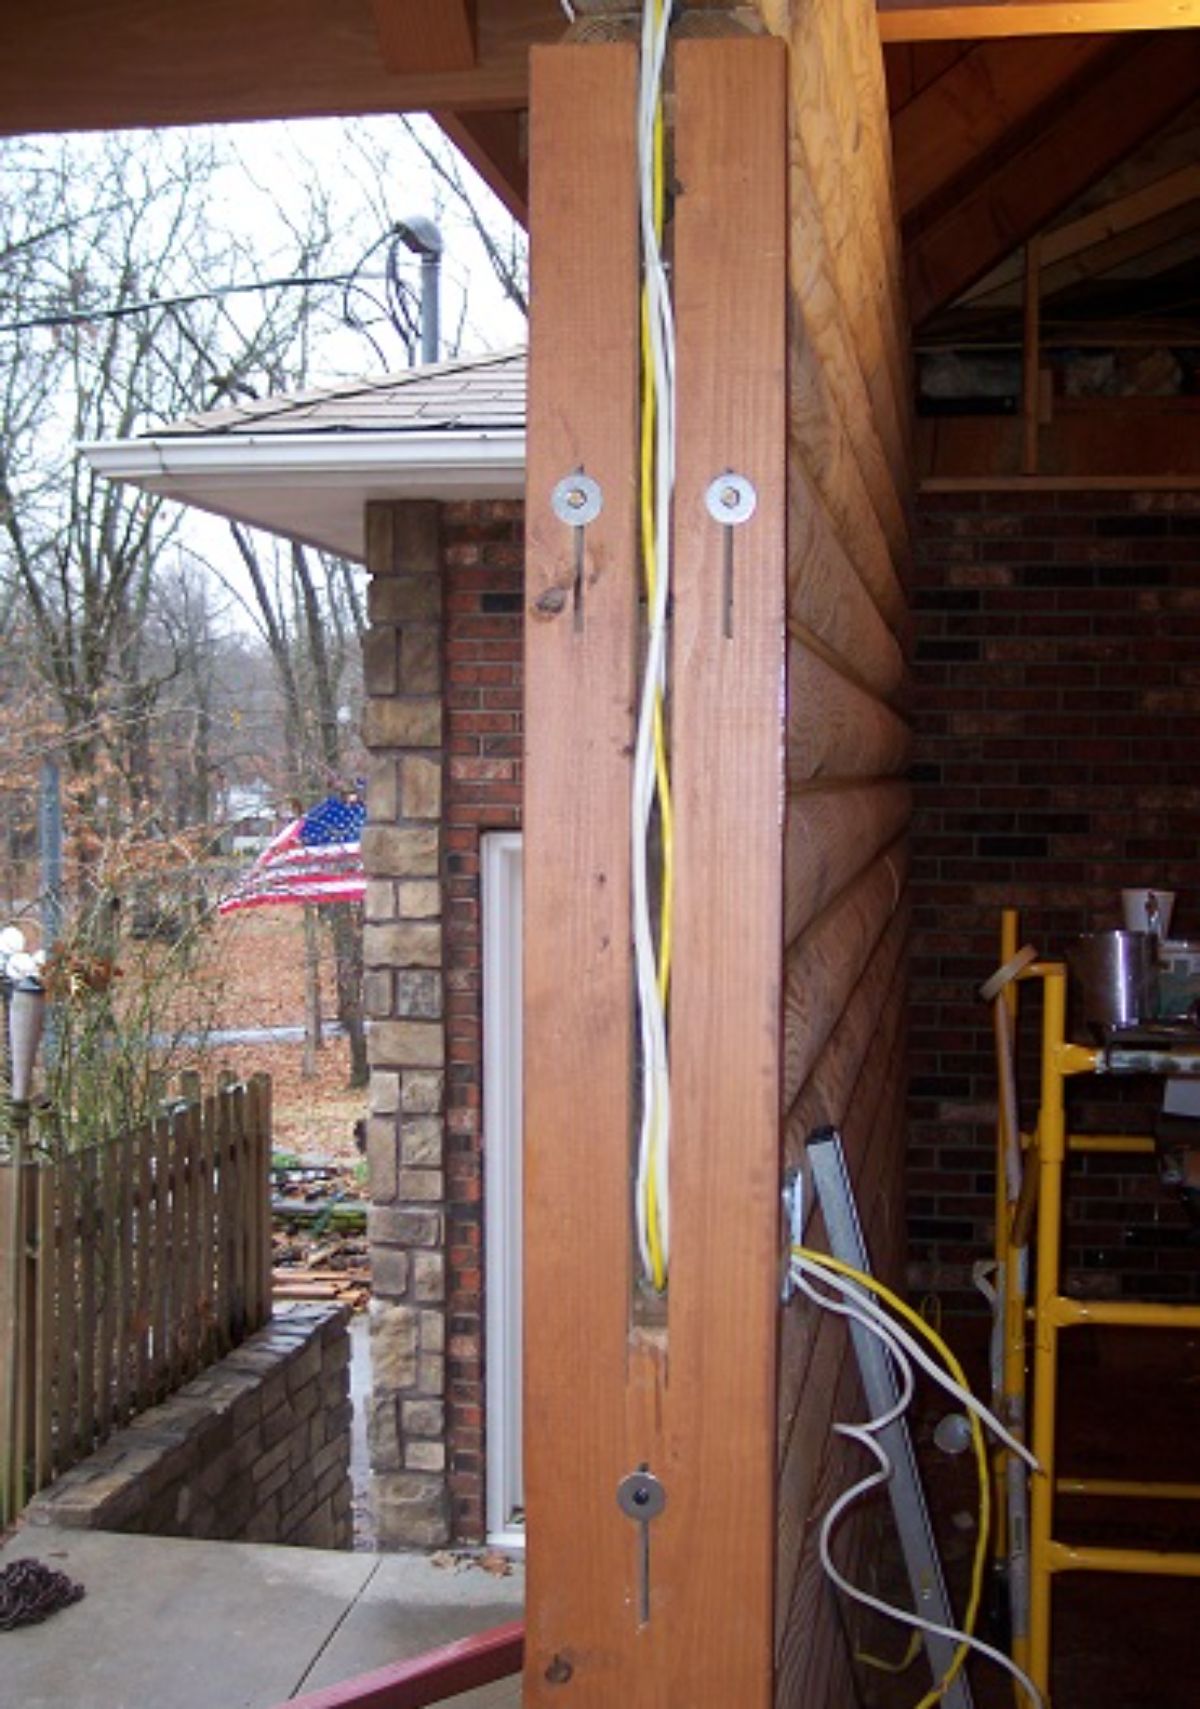
We go back and drill out a vertical wiring chase through the two initial logs making up the lower courses at every outlet location, using at least a 1” x 17" auger bit in a powerful electric drill.


If the cabin is built with a basement or crawl space, we simply drill straight down through both logs and out through the bottom of the floor, sill plate, rim joist or floor truss. Take a length of rebar and make sure the hole is clear and free of wood chips so it's easy to run the electrical cable through later on.
We mark the center of the side of the second log where we’ve drilled the hole so that later on, the electrician can mark the location of the outlet box and carve out a space for the box in the middle of the second log.
He knows he will hit the 1” drilled hole that we provided and he can snake a wire down through the hole to the basement or crawl space.
If we are building a log cabin on a slab, we’ll drill the hole from the top center of the second log at an angle where it will exit in the bottom 2” of the inside of the lowest log, near the sub-floor.
This will be covered with trim later on and allows the electrician to run the wiring underneath the floor between the sleepers laid on the slab or in a channel cut into the sill plate.
This kind of chase requires a metal plate behind the base trim installed to protect the wire from being hit by any nails driven through the trim.
Cutting in Receptacle and Switch Boxes
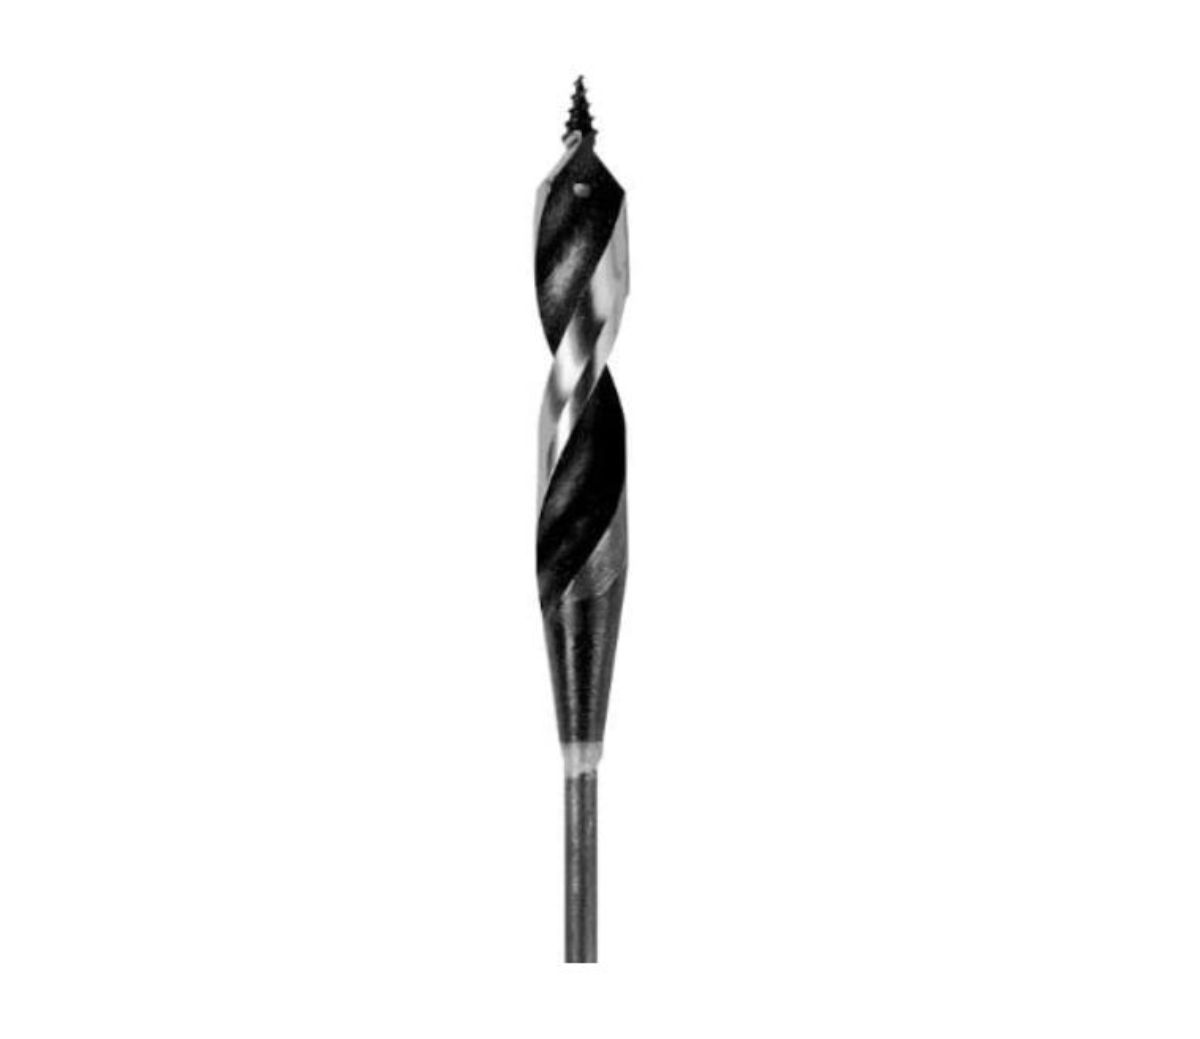
You or your electrician can use regular fiber or plastic Romex boxes and cut them into the log face where you have marked their location using a 2-1/8-inch self-feeding bit to drill out the entire width of the box in one pass. Use smaller bits and a sharp chisel for the corners.
Another alternative is to use sharp 5/8" or 3/4" spade bits and drill out the four corners of the box cut out. Drill these holes about an inch deeper than the depth of the box. Then you can join the holes by cutting around the outline of the box using a reciprocating saw and pop the plug of wood out.
An even better idea for wiring log cabins is to build a template for both receptacle box and switch box cut-outs. Use a scrap of plywood with a hole cut in the center to match the size of the box for each different size of electrical box you will be using.
Make the piece of plywood long enough to rest on the floor and it will locate the proper box height for you. This will ensure that all of your outlets are at exactly the same height.
Using this template with a router will make the cleanest holes with the least trouble, but you'll need a router with a LONG 1/2" straight cutting bit and a 1/2" guide bushing set. Tack the template to the wall with a couple of screws you can remove later.
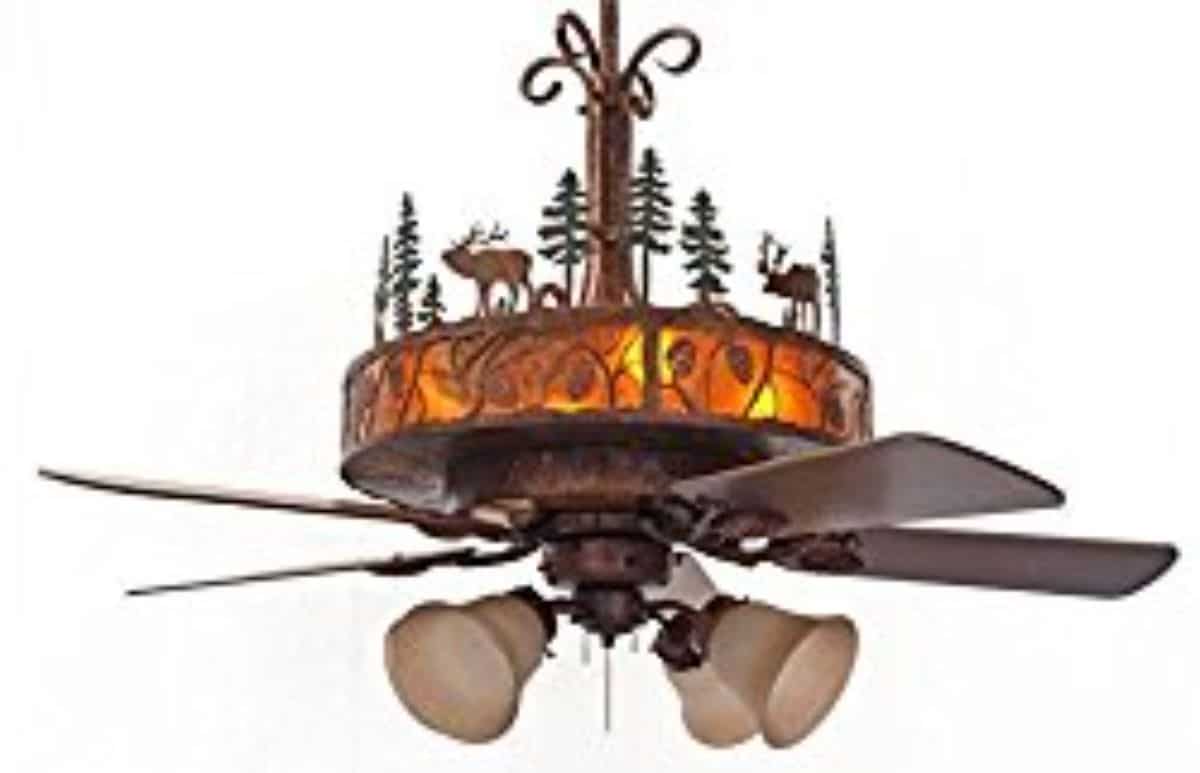
Wiring Log Cabins for Overhead Fans
Overhead ceiling fans are a great addition to log homes. To get the wiring to the fans often requires running the fan control wire up from the door chase where the switch is located.
The easiest way is to drill straight up through the two or three logs above the doorway and into the space between the rafters. You can then run the wires along the rafters like a framed house and drop down from the tongue-and-groove ceiling into an angled box where the ceiling fan or light is mounted.
If you have solid roof beams you can carve out a channel for the wiring in the top of the rafters using a router. If you are using structural insulated panels or SIPs for your cabin roof, these can be ordered with wiring chases built into the panel.
Another option is to use faux wood beams that are hollow and cover over the installed wiring. Obviously these are decorative only and are not structurally sound.


Floor Outlets
An under-utilized resource way to add access to electrical power in log homes is using floor outlets. There are new floor outlet designs that are rugged and useful, while minimizing intrusion into the space. These are often used for cabin lofts where outlets may be required in the outer edges of the loft, away from a wall.
You can choose between tamper-resistant floor outlets with flip-type covers that mount flush on floor, or pop-up style outlets that can be used in wood or cement floors.


Yet another option is a drop-in floor box with a solid brass cover. This simple retro-fit only requires you to drill a hole and drop in the floor outlet. It even comes with its own hole saw for easy installation.
Cabin Interior Walls
Many times interior walls for log homes are built with regular framing and covered with tongue-and-groove to match the solid log walls.
In this case, you can run the wiring through the stud bays in the usual way, drilling each stud and ensuring the correct distance back from the face so that nails and screws used to attach the T&G paneling cannot penetrate the wire.
If you are building with solid log interior walls, you will need to employ the same methods used for exterior walls: drilling wire runs and chases every couple of courses, if necessary, and carving out horizontal channels as needed with a router or saw.
Exterior Outlets in Log Walls
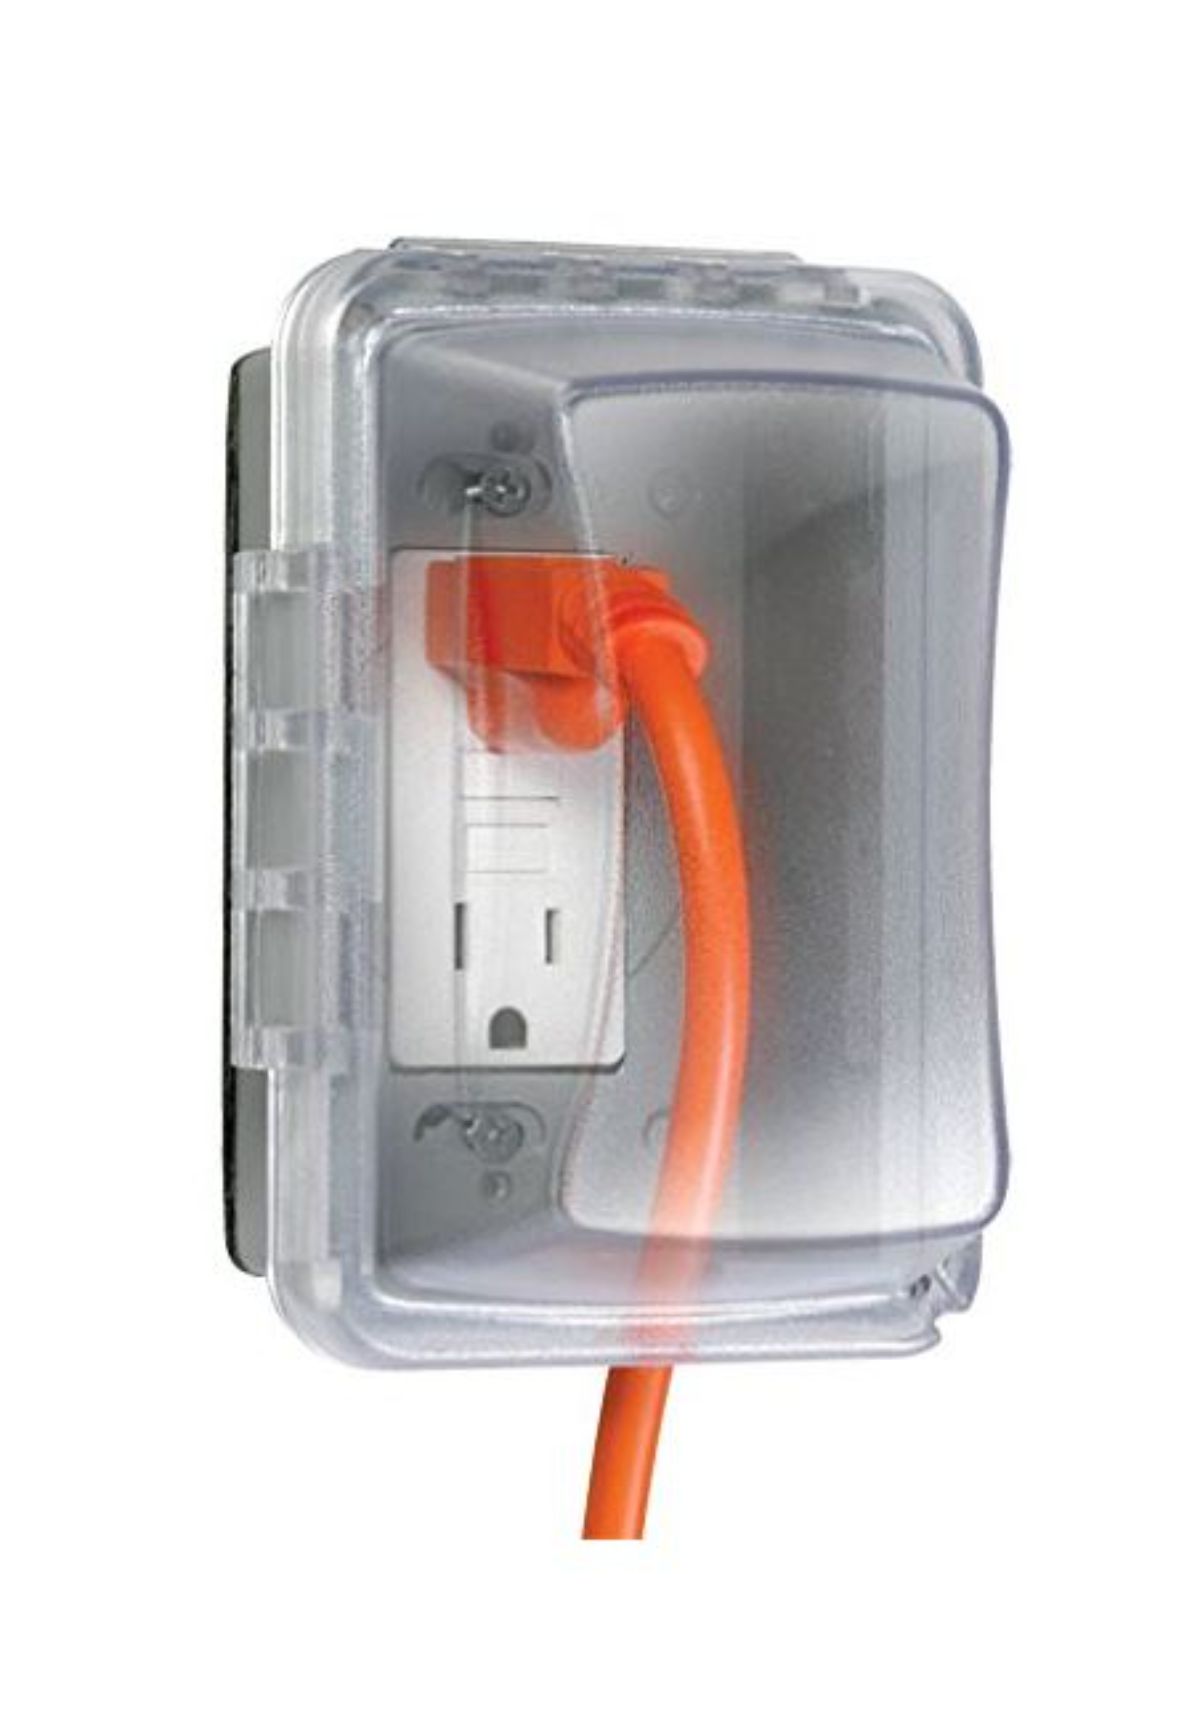
We like to provide several exterior GFCI outlets to make it easy to plug in lawn equipment or deck amenities. Consider adding a dedicated, switched outlet high up under the eaves for exterior holiday lights.
Log cabins are perfect for large outside rooms like decks and porches and it is especially important to provide exterior outlets here. Outdoor kitchens may require their own electrical service.
An easy way to provide power outside is to locate exterior outlets directly opposite interior outlets so that you can share the wiring chases in the log walls or the wiring circuit itself.
Be sure to offset and adequately insulate the space between the outlet boxes so there is no heat loss through the gap where you have drilled.
You can see that wiring log cabins just requires a few special tricks to help you route the wire where you need it and to get through the solid log walls. Once it’s finished you won’t be able to tell where the wires run.
More Log Home Design Pages:
Cabin Roofing Choices Your log cabin roofing choices will affect your budget and long-term enjoyment of your cabin.
REScheck: Tricks of the Trade REScheck is software designed to compute an energy compliance analysis that is needed for building permit applications.
Log Home Building School Learn practical ways to craft your dream at a log home building school.
Log Cabin Design Tips Tips for your log cabin design that will save you money.
Aging In Place Ideas for Your Log Cabin As people become older, remaining in their own home becomes more important and aging in place design can facilitate that.
[…] READ MORE … […]